How to Clean Headphone Plug: Easy Steps for Crystal Clear Sound
Have you ever plugged your headphones into your phone or laptop and heard crackling or silence? Many people think their headphones are broken, but often the problem is a dirty headphone plug. Keeping your headphone plug clean is essential for clear sound, a secure connection, and the long life of your device.
As someone who uses headphones daily for both work and relaxation, I know how frustrating it can be when the sound cuts in and out. I’ve cleaned countless headphone plugs—my own and those belonging to friends. With the right steps, you can fix most sound problems yourself without spending money on repairs or replacements.
This article will show you exactly how to clean your headphone plug safely. I’ll share expert tips, common mistakes to avoid, and some personal experiences to make the process simple. By the end, you’ll know how to keep your music crisp and your calls clear.
Why Cleaning Your Headphone Plug Matters
Most people don’t realize how quickly dust, lint, and oil can build up on a headphone plug. This build-up prevents the plug from connecting well with the headphone jack. You might notice:
- Static or crackling sounds
- One side of the headphones not working
- Sound cutting in and out
- Complete loss of sound
These issues are not just annoying. Over time, a dirty plug can damage both your headphones and the device they connect to. In fact, a study from the Consumer Technology Association found that poor maintenance is a top reason for headphone failure.
Cleaning your plug regularly can extend its life by several years.
Keeping your plug clean also reduces the risk of pushing dirt into your device’s headphone jack, which is harder to clean and can lead to expensive repairs.
Understanding The Headphone Plug
Before you start cleaning, it’s good to know what you’re dealing with. A standard headphone plug is usually 3. 5 mm and made of metal. It has three or four metal bands separated by black rings. These bands carry the sound signal from your device to your headphones.
Here is a quick comparison of common headphone plug types:
| Plug Type | Size | Bands | Common Use |
|---|---|---|---|
| 3.5 mm TRS | 3.5 mm | 3 (Tip-Ring-Sleeve) | Stereo audio |
| 3.5 mm TRRS | 3.5 mm | 4 (Tip-Ring-Ring-Sleeve) | Headset with microphone |
| 6.35 mm TRS | 6.35 mm | 3 (Tip-Ring-Sleeve) | Professional audio |
The plug is tough, but the metal bands can get scratched or corroded if you clean it the wrong way. Using gentle materials is key.

Credit: www.headphonesty.com
Signs Your Headphone Plug Needs Cleaning
Not every sound issue means your plug is dirty, but there are clear signs to look out for:
- Static noise when you move the plug.
- Sound only comes from one ear.
- No sound unless you twist the plug.
- Plug feels loose or doesn’t click in tightly.
I once thought my favorite headphones were broken because the left side kept cutting out. Before buying a new pair, I cleaned the plug with a cotton swab and a bit of alcohol. The sound was instantly clear. Sometimes, a simple cleaning saves you money and hassle.
What You Need To Clean A Headphone Plug
You don’t need expensive tools. In fact, you probably have everything at home. Here’s what you need:
- Soft, lint-free cloth (like microfiber)
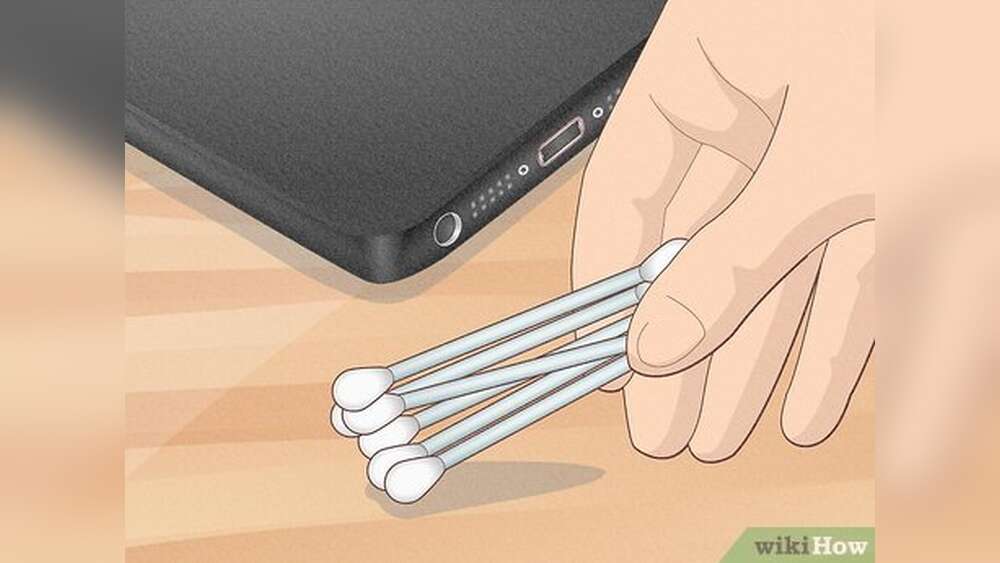
- Cotton swabs
- Isopropyl alcohol (at least 70%)
- Toothpick or wooden stick
- Compressed air (optional, but useful)
- Small brush (like a clean, dry toothbrush)
- Soft rubber eraser (for tough grime)
Never use water, metal brushes, or harsh chemicals. These can damage the plug.
Here’s a quick look at the best and worst cleaning materials:
| Material | Safe to Use? | Why/Why Not |
|---|---|---|
| Isopropyl alcohol | Yes | Evaporates fast, removes oil and dirt |
| Water | No | Can cause rust and leave residue |
| Steel wool | No | Scratches metal, leaves particles |
| Microfiber cloth | Yes | Gentle, doesn’t scratch |
| Toothpick | Yes | Removes stuck lint, won’t scratch |
Credit: www.youtube.com
Step-by-step: How To Clean Your Headphone Plug
Let’s get into the cleaning process. I’ll guide you through each step so you avoid mistakes. You don’t need to be an expert—just careful and patient.
1. Unplug And Inspect
First, unplug your headphones from any device. This is important for safety and to avoid pushing dirt into the headphone jack. Hold the plug up to a bright light. You may see dust, lint, or a dull gray color if there’s oil or corrosion.
2. Wipe The Plug
Take a dry, soft cloth and gently wipe the plug. This removes loose dust and prevents scratching in the next steps. Always wipe from the base to the tip, not side to side.
3. Use Isopropyl Alcohol
Dampen a cotton swab with isopropyl alcohol—don’t soak it. Rub the plug gently, focusing on the metal bands and the black rings. Alcohol breaks down oil and dirt but dries quickly, so it won’t damage the plug.
One tip: Twist the plug slowly as you clean, so the swab covers all sides. If the cotton picks up a lot of dirt, switch to a clean swab.
4. Remove Stubborn Debris
If you see lint or grime stuck in the grooves, use a toothpick. Gently dig out the debris, being careful not to scratch the metal. I once found a tiny piece of pocket lint wedged in my headphone plug, causing constant static.
A toothpick removed it in seconds.
For sticky or tough grime, a soft rubber eraser can help. Rub gently along the bands, then wipe away any eraser bits.
5. Dry And Polish
After cleaning, use a dry microfiber cloth to polish the plug. Make sure no cotton fibers or eraser bits remain. The plug should look shiny and clean.
6. Check The Connection
Plug your headphones into your device and test the sound. If you still hear static or if the plug feels loose, repeat the cleaning. Sometimes, stubborn dirt hides in the grooves.
7. Optional: Clean The Headphone Jack
If cleaning the plug doesn’t fix the problem, the headphone jack might also be dirty. Turn off your device, then use compressed air or a dry brush to blow out dust from the jack. Never insert anything sharp or wet.
Common Mistakes And How To Avoid Them
Many people damage their headphones by cleaning the plug the wrong way. Here’s what to watch out for:
- Using too much liquid. A wet plug can short out your device.
- Scrubbing with rough materials. Metal brushes or sandpaper scratch the plug.
- Forcing debris out. If lint is stuck, work slowly with a toothpick. Don’t dig hard.
- Skipping drying. If you leave moisture on the plug, it can corrode.
- Cleaning while plugged in. Always unplug before cleaning.
I once ruined a pair of studio headphones by cleaning the plug with a wet tissue and plugging it in before it dried. The plug corroded in days, and the sound never recovered.
How Often Should You Clean Your Headphone Plug?
How often you clean depends on how you use your headphones. If you keep them in your pocket or bag, clean the plug once a month. If you use them at a desk and store them in a case, every 2-3 months is enough.
Environment matters too. Dusty or humid places will need more frequent cleaning. If you share your headphones or use them at the gym, wipe them down weekly.
Extra Tips For Long-lasting Headphones
Cleaning the plug is only one part of good headphone care. Here are a few extra tips to keep your headphones working well:
- Store in a case. This keeps lint and dust away.
- Avoid wrapping the cable tightly. It can strain the plug.
- Keep away from water and sweat. If your headphones get wet, dry them before use.
- Check for bent plugs. If the plug is bent, replace the headphones. Bent plugs can damage jacks.
- Use an adapter for frequent plugging and unplugging. If you often switch devices, use a short extension cable. It’s cheaper to replace an adapter than your headphones.
When To Replace Your Headphone Plug
Sometimes, cleaning isn’t enough. If you notice the following, it may be time to replace your headphones or seek repair:
- Plug feels loose in every device
- Visible rust or green corrosion
- Cracked or broken plug casing
- Sound problems remain after cleaning
A professional can sometimes replace the plug, but for most consumer headphones, it’s often cheaper and easier to buy a new pair.
Data: How Dirt Affects Headphone Performance
You might wonder if a bit of dirt really makes a difference. The answer is yes. Here’s a summary of findings from headphone manufacturers and audio engineers:
| Level of Dirt | Typical Sound Issue | Chance of Permanent Damage |
|---|---|---|
| Light dust | Minor static | Low |
| Lint or pocket debris | Sound cuts out | Medium |
| Oil or heavy grime | One side dead | High |
| Corrosion (green/white spots) | No sound, possible device damage | Very high |
Even small amounts of dirt can cause annoying problems, but long-term build-up can destroy both your headphones and the port on your phone or laptop.
Why Isopropyl Alcohol Works Best
You may wonder why isopropyl alcohol is recommended. Isopropyl alcohol is safe for electronics because it:
- Dries quickly
- Removes oil, sweat, and dirt
- Doesn’t cause rust
Other cleaners, like water or household sprays, can leave behind minerals or chemicals that damage the plug. Always choose alcohol that’s at least 70% pure, but 90% is even better.
For more about cleaning electronics, see this CDC guide on disinfection.
Personal Experiences: Cleaning Headphone Plugs
Over the years, I’ve helped friends and family fix their sound problems just by cleaning their headphone plugs. One friend complained that his headphones only worked in one ear. He was ready to buy a new pair. We cleaned the plug together using a cotton swab and alcohol—he was shocked when both sides worked perfectly.
Another time, while traveling, my own headphones started crackling every time I moved. I found a bit of lint stuck to the plug. A quick wipe with my shirt solved the issue until I could clean it properly at home.
These small steps can save money and frustration. If your headphones act up, don’t give up on them until you’ve tried cleaning the plug.

Credit: www.wikihow.com
Frequently Asked Questions
What Should I Do If Cleaning Doesn’t Fix The Sound Problem?
If you’ve cleaned the plug and the sound is still bad, try cleaning the headphone jack on your device with compressed air. Test your headphones on another device. If the problem remains, the headphones may be damaged inside, or the jack may need repair.
Can I Use Hand Sanitizer Instead Of Isopropyl Alcohol?
It’s best not to. Hand sanitizer contains other chemicals and gels that can leave residue or damage the plug. Stick to pure isopropyl alcohol for safe cleaning.
How Can I Tell If The Plug Is Corroded?
Corrosion appears as green, white, or gray spots on the metal bands. If you see this, try cleaning with alcohol. If it doesn’t come off, the plug may need to be replaced.
Is It Safe To Clean The Plug Every Week?
Yes, if you use gentle materials. Weekly cleaning is helpful if you use headphones in dusty places or during workouts. Always make sure the plug is dry before use.
Can I Fix A Bent Headphone Plug By Straightening It?
No. Trying to bend it back usually makes things worse and can break the wires inside. If the plug is bent, it’s best to replace the headphones.
Keeping your headphone plug clean doesn’t take much time, but it can make a huge difference in sound quality and device life. With regular care and the right tools, you’ll enjoy music, calls, and videos without annoying interruptions. If you ever run into sound issues, remember—a clean plug is often the easiest fix.