
How to Install Aprilaire Humidifier: Step-by-Step Guide
If you want to improve the air in your home, installing an Aprilaire humidifier is a smart step. Dry air can make you feel uncomfortable, give you dry skin, and even make you sick. A humidifier adds just the right amount of moisture to your air, making your home feel more comfortable, especially in winter. I’ve installed several Aprilaire units for myself and friends, so I know the process and the common challenges. In this guide, I’ll walk you through everything you need to know to install your Aprilaire humidifier, even if you’re new to home projects. You’ll learn how to choose the right model, gather the tools, and avoid mistakes that could cost you time and money.
Why Choose An Aprilaire Humidifier?
Aprilaire is a well-known brand with a good reputation for quality and performance. Their humidifiers are designed for whole-house use, which means they connect directly to your HVAC system. This gives you better control over your indoor humidity levels. Aprilaire models are also efficient, low-maintenance, and built to last. Some key benefits include:
- Consistent humidity: No more dry nose or throat at night.
- Protects wood furniture and floors: Stable humidity prevents cracking.
- Better health: Reduces the risk of respiratory problems.
From my personal experience, I noticed fewer colds in my house after installing an Aprilaire unit. My wooden floors also stopped creaking as much. These benefits are easy to overlook until you experience them yourself.
Choosing The Right Aprilaire Model
Before you start, you need to pick the right humidifier for your home. Aprilaire offers several models, each with different features and capacities. Here’s how to make the right choice:
Consider Your Home Size
Each model is rated for a specific square footage. For example:
| Model | Max Home Size | Water Capacity |
|---|---|---|
| Aprilaire 500 | Up to 3,000 sq. ft. | 0.5 gallons/hour |
| Aprilaire 700 | Up to 4,200 sq. ft. | 0.75 gallons/hour |
| Aprilaire 800 | Up to 6,200 sq. ft. | 11.5 gallons/day (steam) |
If you have a small home or apartment, the Aprilaire 500 is usually enough. For larger homes or if you want more power, the Aprilaire 700 or 800 is better.
Check Your Hvac System
Not all models work with all types of HVAC systems. For example, the Aprilaire 800 uses steam and is good for homes with radiant or forced air systems. Always check the compatibility before you buy.
Understand Extra Features
Some Aprilaire models have automatic humidistats (they adjust themselves), while others are manual. Automatic models are easier to use, but they cost a bit more.
What You Need Before Installation
Gather all your tools and parts before you start. This helps you avoid delays or trips to the hardware store.
Tools And Materials
You’ll need:
- Drill and bits
- Screwdrivers (Phillips and flathead)
- Level
- Tin snips (for cutting sheet metal)
- Wrench set
- Pliers
- Measuring tape
- Duct tape or aluminum tape
- Pipe cutter (for water line)
- Safety goggles and gloves
Most Aprilaire humidifiers come with a complete installation kit, but double-check for:
- Humidifier unit
- Control panel (humidistat)
- Water line and saddle valve
- Drain tubing
- Mounting template and hardware
When I did my first install, I forgot to buy a pipe cutter. I tried using a regular saw, but it made a mess and slowed me down. It’s always easier to have the right tool for the job.
Planning Your Installation
Take time to plan your installation before making any cuts or holes. This step is easy to skip but saves trouble later.
Pick The Right Spot
The humidifier should be installed on the supply plenum (the big metal duct that sends warm air into your house). If there’s not enough space, you can use the return plenum (where air comes back to the furnace), but supply is better.
The control panel or humidistat should be easy to reach and away from direct airflow.
Safety First
- Turn off power to your furnace at the breaker.
- Shut off the water supply.
Never skip these steps. Electricity and water are dangerous together.
Step-by-step Installation Guide
Now, let’s get to the heart of the process. I’ll walk you through a typical installation for an Aprilaire 700—the steps are similar for other models, with some small changes.
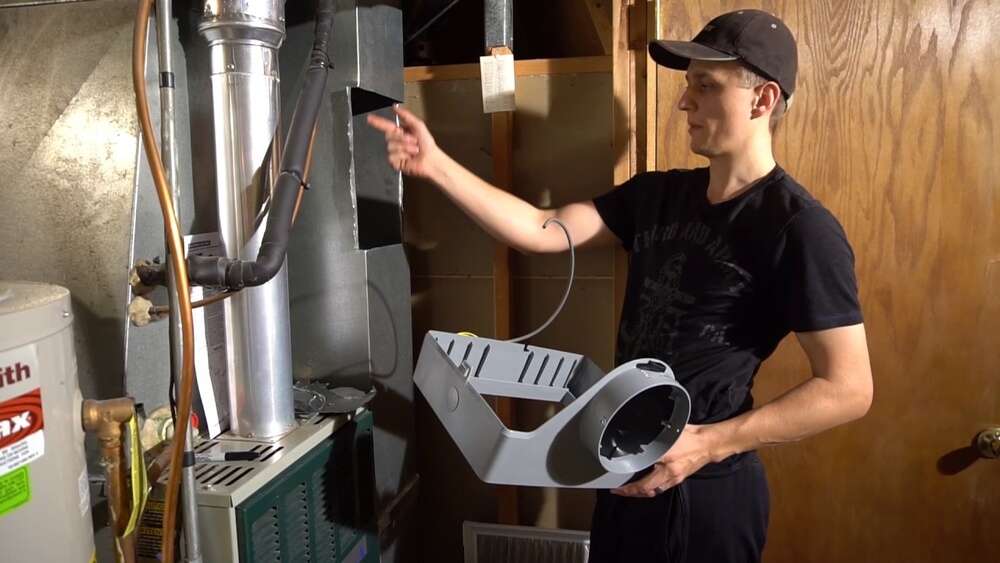
1. Mount The Humidifier
- Mark the spot on your supply plenum using the provided template. Make sure the humidifier is level.
- Cut the hole using tin snips. Wear gloves to protect your hands.
- Attach the humidifier to the duct using the screws from the kit.
One tip: Use duct tape to seal any gaps around the cutout. This improves efficiency and keeps air from leaking.
2. Install The Water Line
- Locate a cold water pipe near your furnace.
- Attach the saddle valve (included in the kit) to the pipe. Tighten until it pierces the pipe wall.
- Run the water tubing from the valve to the humidifier’s inlet.
Use a pipe cutter for a clean cut. Avoid over-tightening the valve; it can damage the pipe.
3. Connect The Drain
All Aprilaire humidifiers need a drain line for extra water. Run the plastic tubing from the humidifier to a nearby floor drain or sump pump.
- Make sure the tubing slopes downward.
- Secure the tubing so it won’t move or leak.
4. Wire The Humidifier
This step can be tricky if you’re not comfortable with electrical work.
- Connect the wires from the humidifier to your furnace control board, following the diagram in your manual.
- Install the humidistat on the return air duct or wall.
- Run the wiring from the humidistat to the humidifier and furnace as shown.
If you’re unsure, call a licensed electrician. I made this mistake once—crossed a wire and blew a fuse. It’s better to be safe.
5. Test And Set Up
- Turn the water supply back on.
- Restore power to the furnace.
- Set the humidistat to your desired humidity level (usually 35-45%).
Watch for leaks and listen for the unit to turn on. You should hear water flowing and see the humidifier working within a few minutes.
Common Installation Mistakes And How To Avoid Them
Even with a good manual, people make simple mistakes during installation. Here’s what to watch out for:
- Wrong location: Don’t install on a sloped or uneven surface.
- No drain: Skipping the drain line can cause water damage.
- Bad wiring: Mixing up wires can break your humidifier or furnace.
- Leaky connections: Always check for drips at every joint.
- Not sealing edges: Air leaks reduce performance.
A common error I see is people forgetting to slope the drain tubing. The water must flow downhill all the way to the drain, or it can back up and spill.

Credit: www.reddit.com
Maintenance Tips After Installation
Installing your Aprilaire humidifier is just the first step. Keeping it in good condition ensures it works for years.
- Change the water panel (filter) every 6-12 months. Hard water may require more frequent changes.
- Check for leaks monthly, especially during the first heating season.
- Clean the drain line once a year to prevent clogs.
- Inspect wiring and connections during your annual furnace checkup.
Some Aprilaire models show a “Change Water Panel” light. Don’t ignore it! A clogged panel can make your system work harder and cost you more in energy bills.
Comparing Aprilaire Models
If you’re still deciding which model fits best, here’s a quick comparison to help you see the key differences:
| Feature | Aprilaire 500 | Aprilaire 700 | Aprilaire 800 |
|---|---|---|---|
| Type | Bypass | Fan-powered | Steam |
| Water Usage | 0.5 gal/hr | 0.75 gal/hr | 11.5 gal/day |
| Home Size | Up to 3,000 sq. ft. | Up to 4,200 sq. ft. | Up to 6,200 sq. ft. |
| Drain Required | Yes | Yes | Yes |
| Cost | $$ | $$$ | $$$$ |
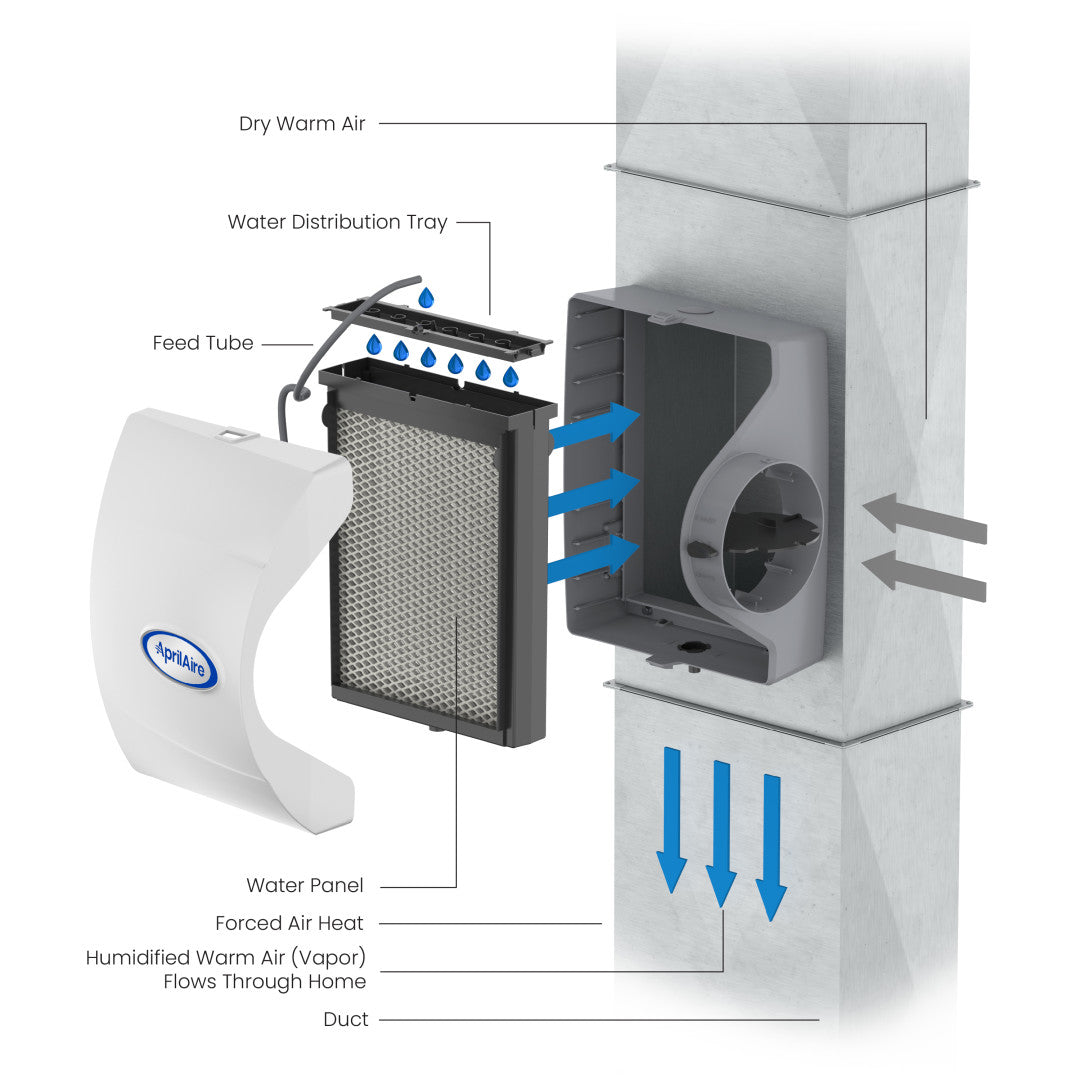
Bypass models (like the 500) use your furnace blower, while fan-powered (like the 700) have their own fan for better output. The steam model (800) is best for very large homes or special needs.
Credit: shop.aprilaire.com
When To Call A Professional
While many homeowners can install an Aprilaire humidifier, sometimes it’s better to hire a pro. Here’s when:
- You’re not comfortable with electrical wiring.
- Your ductwork is hard to access.
- You have an unusual HVAC setup.
- Local codes require a licensed installer.
When I helped a friend install his Aprilaire 800, we realized his home had an older electrical panel that wasn’t compatible. We called a certified HVAC technician. It saved us time and prevented potential safety problems.
Tips For A Smooth Installation
Experience has taught me a few things that make installation easier:
- Read the manual first: Every model has unique steps.
- Take photos of your furnace wiring before disconnecting anything.
- Have towels handy: Water lines can leak during setup.
- Label wires as you remove them. This avoids confusion later.
- Use a level for mounting. A crooked humidifier can cause leaks.
It’s also smart to install the humidistat at chest height for easy access and accurate readings.
How To Set The Right Humidity Level
Setting the right humidity is important. Too little and you won’t get the benefits; too much can cause mold or window condensation. The recommended indoor humidity is 35-45% in winter.
Here’s a quick reference:
| Outdoor Temperature | Recommended Indoor Humidity |
|---|---|
| Above 20°F | 35-40% |
| 10°F to 20°F | 30-35% |
| 0°F to 10°F | 25-30% |
| Below 0°F | 20-25% |
Adjust your humidistat as the weather changes. If you see water on windows, lower the humidity.
Safety And Local Code Considerations
Every area has building codes for home appliances. Some require permits or inspections. Before starting:
- Check your local codes online or with your city office.
- Get a permit if required.
- Follow manufacturer instructions exactly.
Improper installation can void your warranty or even your homeowner’s insurance. For more information about building codes, visit the EPA’s official site.
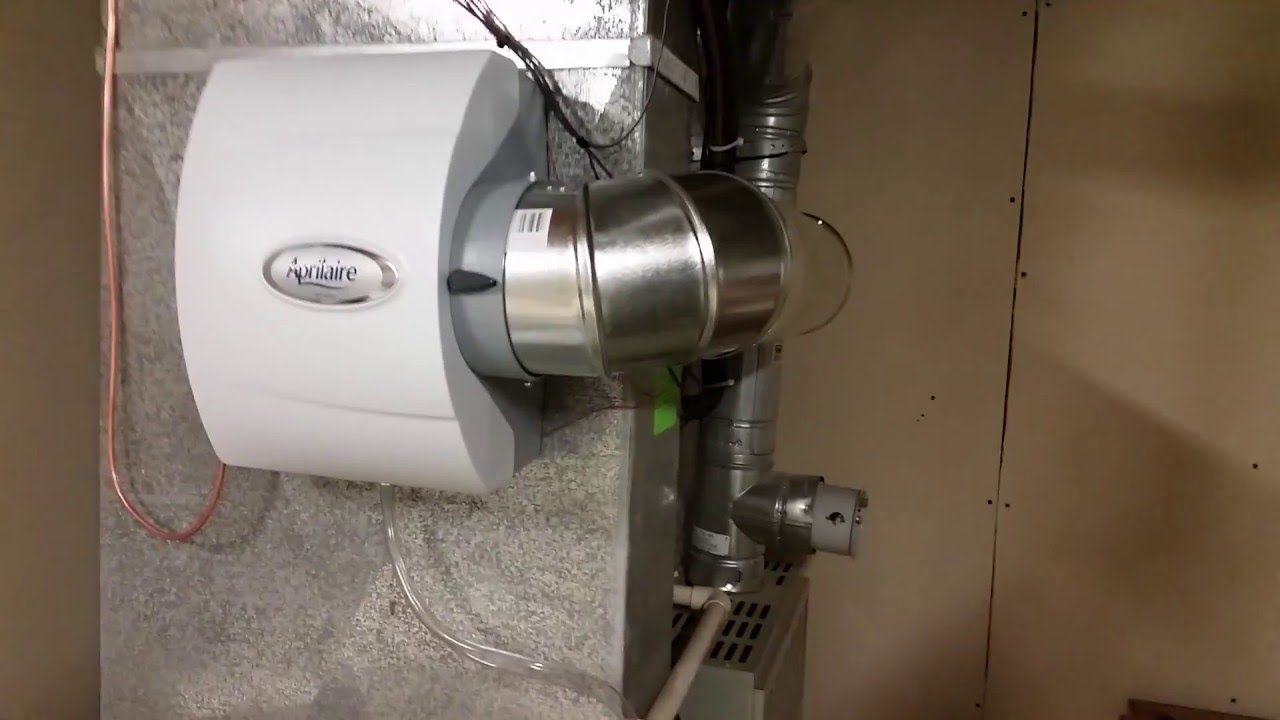
Credit: www.youtube.com
What To Expect After Installation
Once your Aprilaire humidifier is running, you should notice:
- Softer skin and less static
- Fewer allergy and asthma symptoms
- Better sleep quality
- Protected wood floors and furniture
You might also see a small increase in your water bill, but most users find it’s worth the extra comfort.
Troubleshooting Simple Problems
Sometimes things don’t work perfectly at first. Here’s how to fix common issues:
- No water flow: Check that the saddle valve is fully open and the tubing isn’t kinked.
- Humidifier not turning on: Make sure power is restored and wiring is correct.
- Water leaking: Tighten all connections and check for cracks in the tubing.
- Not enough humidity: Make sure the furnace blower is running when the humidifier is on.
If you can’t solve the problem, call customer support or a local technician.
Frequently Asked Questions
How Long Does It Take To Install An Aprilaire Humidifier?
Most installations take 2 to 4 hours, depending on your experience and your home’s layout. My first install took about 3 hours, including time to double-check each step.
Do I Need Special Tools?
Most tools are common household items, like drills, screwdrivers, and wrenches. You may need tin snips for cutting ductwork and a pipe cutter for the water line.
Can I Install It On Any Furnace?
Aprilaire humidifiers work with most forced-air furnaces. Some models require more space or special wiring. Always check your furnace’s manual and the Aprilaire installation guide.
How Often Should I Change The Water Panel?
You should change the water panel or filter every 6 to 12 months. If you have hard water, check more often because mineral buildup can clog the panel.
Is It Safe To Install A Humidifier Myself?
Yes, if you follow the instructions and take safety precautions. However, if you are unsure about wiring or plumbing, it’s best to call a professional to avoid risks.
Installing an Aprilaire humidifier can make your home healthier, protect your belongings, and give you comfort all winter long. With the right tools, careful planning, and attention to detail, most people can complete the job on a weekend afternoon. If you run into trouble, don’t hesitate to ask for help.
Your effort will pay off for years to come.