How to Clean Mineral Deposits from Humidifier: Easy Steps
If you’ve ever opened your humidifier and seen a white or chalky coating inside, you’re not alone. Many people face this problem, especially if they use tap water. These chalky layers are called mineral deposits or “scale.” Over time, they can harm your humidifier, lower its performance, and even push white dust into your air. Cleaning these deposits is easier than you think, and you don’t need special tools or chemicals. I’ve cleaned my own humidifiers (and a few for friends), so I’ll share simple steps, tips, and what to avoid. This guide will help you keep your humidifier fresh, safe, and working like new.
Why Mineral Deposits Matter
Mineral deposits build up when water with dissolved minerals (like calcium, magnesium, and lime) evaporates. What’s left behind is a hard crust that sticks to the tank, base, and parts inside. If you don’t remove it, several problems can happen:
- The humidifier works less efficiently.
- The machine gets noisy or stops working.
- White dust can spread in your room.
- Bacteria or mold can grow in the buildup.
I remember, once I let my humidifier run for weeks without cleaning. The mist output dropped, and I noticed a grayish-white dust on my bookshelf. That’s when I realized how important regular cleaning is—not just for the device, but for the air I breathe.
What Causes Mineral Deposits In Humidifiers
The main cause is hard water. This is water with high levels of minerals, especially calcium and magnesium. Most tap water in the US is hard to some degree. When this water turns into mist, the minerals stay inside the machine. Over time, they harden into crusts.
If you use your humidifier daily, these deposits can build up fast. Even distilled water can leave some residue, but much less than tap water.
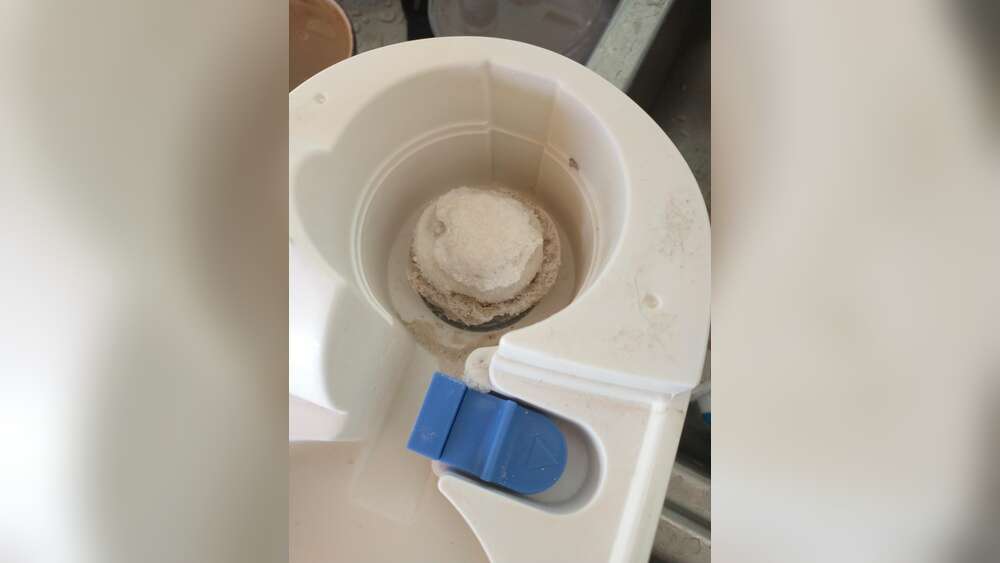
How To Tell If Your Humidifier Has Mineral Deposits
Look for these signs:
- White or gray crust inside the tank or on the base
- Lower mist output than usual
- White dust near the humidifier
- Strange smell from the device
Sometimes, the deposits hide inside small parts or on the misting plate. Shine a flashlight inside the tank or use your finger to feel for rough spots.
Supplies You’ll Need
Before you start, gather these basic items:
- White vinegar (best for dissolving mineral deposits)
- Soft brush (like an old toothbrush)
- Clean cloth or sponge
- Water (distilled if possible)
- Gloves (optional, to protect your hands)
- Mild dish soap (if the tank is dirty or smells bad)
- Cotton swabs (for small corners)
- Basin or bucket (for soaking parts)
You don’t need expensive cleaners. In fact, I once tried a store-bought humidifier cleaner but found vinegar worked better and cost almost nothing.
Credit: betweennapsontheporch.net
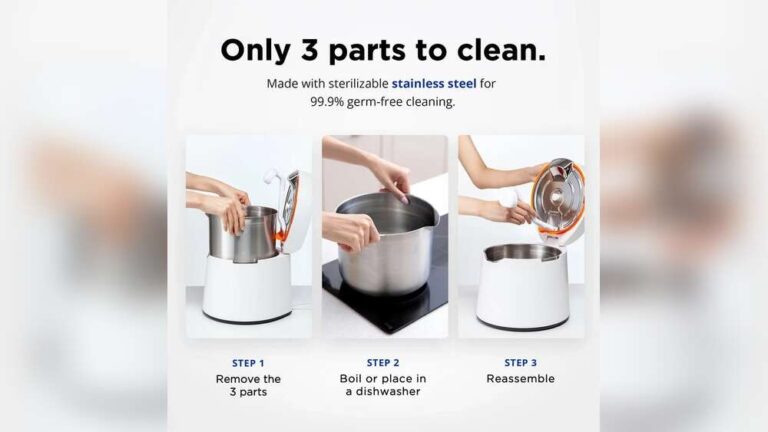
Step-by-step: Cleaning Mineral Deposits From Your Humidifier
Let’s walk through the process. I’ll explain each step simply, with tips and examples from my own routine.
1. Unplug And Disassemble
Always unplug your humidifier first. Remove the water tank, base, and any detachable parts. Check your manual for instructions if you’re not sure how to take it apart.
2. Empty The Water
Pour out any leftover water. Don’t let water sit in the tank—this can breed bacteria and make the deposits worse.
3. Soak Parts In Vinegar
Pour enough white vinegar into the tank and base to cover areas with deposits. Let them soak for 30–60 minutes. Vinegar breaks down minerals gently but effectively.
How Vinegar Works
Vinegar contains acetic acid, which reacts with minerals like calcium and magnesium to dissolve them. This is safe for plastic and most parts, but avoid soaking electrical components.
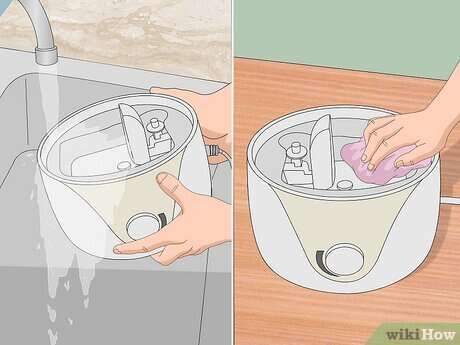
4. Scrub Gently
After soaking, use a soft brush or toothbrush to scrub away loosened deposits. Focus on rough spots or crevices. For hard-to-reach corners, use cotton swabs dipped in vinegar.
If deposits are stubborn, soak again for another 30 minutes.
5. Clean The Mist Plate Or Ultrasonic Membrane
Some humidifiers have a small misting plate or “ultrasonic membrane.” This part is delicate—never scrape it with metal or use harsh brushes. Instead, dip a cotton swab in vinegar and gently wipe the plate.
I once scratched a membrane using a rough sponge. The mist output dropped, and I had to replace the part. Be gentle, and never force off hard scale.
6. Rinse Thoroughly
After cleaning, rinse all parts with clean water several times. Make sure no vinegar smell remains. If you use tap water to rinse, consider giving a final rinse with distilled water to reduce residue.
7. Dry Completely
Wipe parts with a clean cloth and let them air dry. Never reassemble or use the humidifier while parts are still wet inside, as this can cause mold or mildew to grow.
8. Reassemble And Test
Put the humidifier back together. Fill with fresh water (distilled if possible) and run it to check for proper mist output and no strange smells.
Quick Reference: Cleaning Steps And Timing
Here’s a handy table showing each step, what you need, and how long it takes.
| Step | Supplies Needed | Time (minutes) |
|---|---|---|
| Unplug & Disassemble | — | 5 |
| Empty Water | — | 2 |
| Soak in Vinegar | Vinegar, Basin | 30–60 |
| Scrub Gently | Brush, Swabs | 10–15 |
| Clean Mist Plate | Swabs, Vinegar | 5 |
| Rinse & Dry | Water, Cloth | 10 |
| Reassemble & Test | — | 5 |
Total time is about 60–90 minutes, including soaking.
How Often Should You Clean?
- Daily: Empty water, rinse, and refill to prevent buildup and bacteria.
- Weekly: Do a full vinegar cleaning if you use hard water.
- Monthly: Deep clean, especially if you notice scale or white dust.
If you use distilled water, you can clean less often. But don’t skip regular checks—deposits can still build up slowly.
What To Avoid When Cleaning Humidifiers
Not all cleaning methods are safe. Here are some things to avoid:
- Bleach or harsh chemicals: These can damage plastic and leave dangerous fumes.
- Metal brushes or scouring pads: They scratch and damage delicate parts.
- Soaking electrical parts: Always keep electrical parts dry.
- Forcing off hard scale: This can break parts. Soak longer instead.
I once tried using lemon juice instead of vinegar. It smelled nice but didn’t work as well on thick deposits. Stick with vinegar for best results.

Credit: www.youtube.com
Comparing Cleaning Methods
How does vinegar compare to other cleaning methods? Here’s a quick comparison:
| Method | Effectiveness | Safety | Cost |
|---|---|---|---|
| White Vinegar | High | Safe for most parts | Very low |
| Lemon Juice | Medium | Safe | Low |
| Bleach | High (for bacteria) | Not safe for regular use | Low |
| Commercial Cleaners | High | Check instructions | Medium–High |
White vinegar is best for mineral deposits, while bleach is only for disinfecting, not for scale.
Preventing Mineral Buildup: Pro Tips
Stopping scale before it starts is the best way to keep your humidifier clean. Here’s what I do, and what experts recommend:
- Use distilled or demineralized water. It contains fewer minerals, so less scale forms.
- Empty and dry the tank daily. Don’t let water sit overnight.
- Clean weekly. Even a quick rinse helps.
- Consider a demineralization cartridge. Some humidifiers offer these filters to trap minerals before they build up.
- Check your water source. If you know your tap water is hard, switch to bottled or distilled for your humidifier.
I started using distilled water a few years ago. The difference was huge—no more white dust, and I only needed to deep clean once a month instead of weekly.
Credit: www.reddit.com
Types Of Humidifiers And How Deposits Affect Them
Different humidifier types handle mineral deposits in their own ways. Here’s a breakdown:
| Type | How Scale Forms | Cleaning Difficulty |
|---|---|---|
| Ultrasonic | High (white dust common) | Moderate |
| Evaporative (Wick) | Medium (on wick & base) | Easy–Moderate |
| Steam/Vaporizer | Low (most minerals stay in tank) | Easy |
| Impeller | Medium | Easy |
Ultrasonic humidifiers are most affected by mineral buildup. They turn water into a fine mist, so minerals can spread as dust. Evaporative models trap minerals in a wick, but wicks need to be replaced often.
Common Mistakes To Avoid
From my experience (and cleaning a few “lost cause” machines for friends), here are mistakes to watch out for:
- Waiting too long between cleanings. Scale gets much harder to remove over time.
- Using tap water in hard water areas. This guarantees fast buildup.
- Not rinsing after vinegar cleaning. Vinegar left inside can smell and even hurt the machine.
- Cleaning only the tank. Deposits often hide in the base or misting plate.
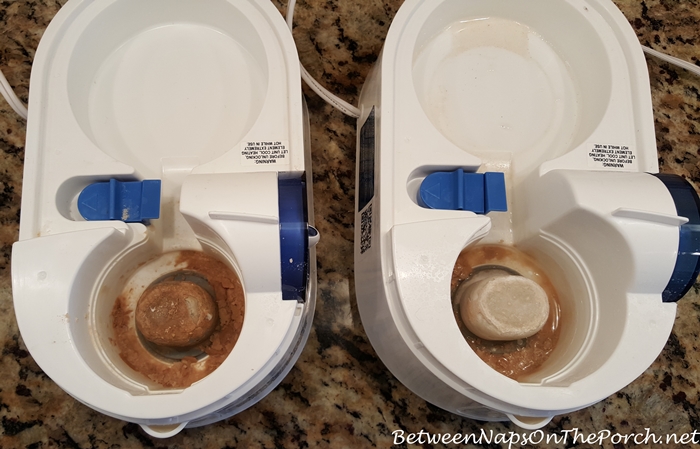
Deep Cleaning For Stubborn Buildup
If your humidifier has thick, hard scale that won’t budge with a single cleaning, try these steps:
- Repeat vinegar soak: Leave overnight if safe for your model.
- Use a little baking soda: Sprinkle on a damp sponge and rub gently.
- Clean small parts separately: Take out removable mist plates or filters and soak them.
- Replace parts if needed: Sometimes, wicks or plates are too damaged to clean.
I once inherited an old humidifier with years of buildup. After two long soaks and some gentle scrubbing, most of the scale came off. But the wick was too clogged and needed replacing.
When To Replace Your Humidifier
Even with great care, all humidifiers wear out. Here are signs it’s time for a new one:
- Deposits won’t come off after repeated cleaning.
- The machine is noisy or leaks.
- Mist output is weak, even after cleaning.
- Plastic parts are cracked or smell bad.
- Filters or wicks are no longer available.
In most cases, a good cleaning extends the life of your humidifier. But if cleaning takes longer than buying a new one, it’s time to upgrade.
The Importance Of Regular Maintenance
A clean humidifier doesn’t just work better—it’s healthier. Dirty machines can spread bacteria, mold, and minerals into your air. For children, people with asthma, or pets, this is especially important.
The US Environmental Protection Agency (EPA) recommends cleaning humidifiers every three days to one week, depending on use. If you notice any pink or green slime, clean immediately.
For more on humidifier care, check out the EPA’s humidifier guidelines.
Frequently Asked Questions
How Do I Remove Really Thick Mineral Deposits?
For thick, stubborn deposits, try soaking the part in white vinegar overnight. If that’s not enough, sprinkle a little baking soda on a damp sponge and gently rub the area. Never use metal tools or force, as this can damage the surface.
Can I Use Lemon Juice Instead Of Vinegar?
Lemon juice has some acid and can work for light deposits, but it’s not as strong as vinegar. For best results, stick with white vinegar. It’s safe, cheap, and works faster on tough scale.
Is It Safe To Use Bleach To Clean My Humidifier?
Bleach can kill bacteria, but it’s not good for regular cleaning of mineral deposits. It can damage parts and leave dangerous fumes. Only use bleach if your manual says it’s okay, and always rinse several times with water after.
How Do I Stop White Dust From My Humidifier?
White dust comes from minerals in your water. The best way to stop it is to use distilled or demineralized water. Some humidifiers also have special filters or cartridges that trap minerals before they turn into dust.
Can I Clean The Humidifier Without Taking It Apart?
You should always take the humidifier apart as much as possible for proper cleaning. Buildup often hides inside, where you can’t see it. If you can’t disassemble, at least rinse and shake the tank with vinegar and water, then rinse well.
Keep Your Humidifier Clean And Breathe Easy
Cleaning mineral deposits from your humidifier is simple but makes a huge difference. Regular cleaning keeps your machine running well, stops white dust, and protects your health. Remember, use white vinegar, scrub gently, and avoid harsh chemicals or metal tools.
Use distilled water to prevent buildup, and clean often—don’t wait for problems to show. With these steps, your humidifier will give you clean, comfortable air all season long.