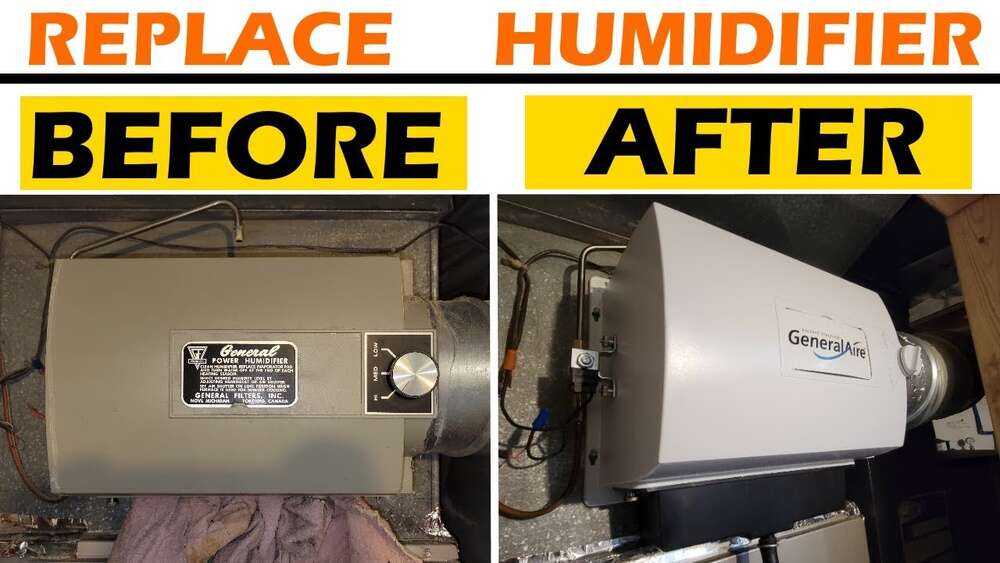
How to Replace Furnace Humidifier: A Step-by-Step Guide
If you’ve ever walked into your home on a cold winter day and felt dry air, you know how uncomfortable it can be. Dry indoor air can cause dry skin, itchy eyes, and even problems with wood floors and furniture. That’s where a furnace humidifier comes in. This device adds moisture to the air, helping your home feel warmer and more comfortable. But like any appliance, furnace humidifiers don’t last forever. If yours has stopped working or isn’t keeping up, replacing it is a smart move. I’ve replaced several over the years—both for myself and for friends—so I’m sharing everything you need to know. Whether you’re a homeowner or a handy renter, you can do this project with a bit of guidance and patience.
Why Replace Your Furnace Humidifier?
A furnace humidifier usually lasts about 10 years. Sometimes it fails sooner, sometimes later. Common signs it’s time for a replacement include:
- The humidifier isn’t adding moisture to the air.
- Water leaks around the unit or on the floor.
- Strange noises or electrical issues.
- High energy bills from a struggling system.
Replacing an old humidifier can improve your comfort, protect your home, and even save on heating costs. I remember one winter when my old humidifier quit. My skin was so dry, and static shocks were everywhere. Installing a new one made a huge difference within a week.
Types Of Furnace Humidifiers
Before you start, it’s good to know the different types available. Here’s a quick guide to the main options:
| Type | How It Works | Best For | Maintenance |
|---|---|---|---|
| Bypass | Uses furnace airflow to add moisture. | Most homes, simple setup. | Change pad once a year. |
| Fan-powered | Has its own fan to push moist air. | Larger homes, more control. | Change pad once a year, clean fan. |
| Steam | Boils water to create steam. | Very dry climates, best humidity control. | Regular cleaning, more complex. |
Most homes use bypass or fan-powered models. Steam models are less common and cost more.
Choosing The Right Replacement
When selecting a new humidifier, consider these key factors:
- Compatibility: Make sure the unit fits your furnace. Check your furnace’s model number and compare it with the humidifier’s manual.
- Capacity: Humidifiers are rated by how many gallons of water they can add per day. For a 2,000-square-foot home, a 12-gallon-per-day unit is usually enough.
- Type: As discussed above—choose bypass, fan-powered, or steam.
- Features: Some models have digital controls, automatic shutoff, or filter indicators.
- Budget: Prices range from $100 for basic units to over $600 for advanced steam models.
Here’s a simple comparison of common brands and their average costs:
| Brand | Type | Average Price | Warranty |
|---|---|---|---|
| Aprilaire | Bypass/Fan-powered | $150–$400 | 5 years |
| Honeywell | Bypass/Fan-powered | $120–$350 | 5 years |
| GeneralAire | Bypass | $130–$300 | 10 years |
| Carrier | Steam | $400–$700 | 5 years |
A big mistake I see is buying a humidifier that’s too small or too large. Too small, and your home stays dry. Too large, and you risk mold and water problems. Always check the size recommendations.
Tools And Materials Needed
Replacing a furnace humidifier isn’t as hard as it looks, but you’ll need a few tools and supplies:
- New humidifier kit (with instructions)
- Screwdrivers (Phillips and flathead)
- Adjustable wrench
- Drill with bits
- Tin snips (for sheet metal)
- Level
- Teflon tape (for plumbing)
- Water supply line (if not included)
- Small bucket or towels
- Electrical tape
- Safety glasses and gloves
Some kits include almost everything. Double-check before you buy so you’re not running to the store mid-project. On my last job, I forgot Teflon tape and had to improvise with plumber’s putty—not ideal!
Safety First
Before you start, always:
- Turn off the furnace power at the breaker.
- Shut off the water supply to the humidifier.
- If you’re not comfortable with electrical or plumbing work, consider calling a pro. Safety is more important than saving a few dollars.
Removing The Old Humidifier
Let’s get started with the removal process. Here’s how I do it:
- Power Off: Flip the breaker for your furnace and humidifier.
- Shut Off Water: Turn the saddle valve or shutoff valve on the water line to the humidifier.
- Remove Cover: Use a screwdriver to take off the humidifier’s front cover.
- Disconnect Water Line: Unscrew the water line from the old humidifier. Have a towel ready for drips.
- Disconnect Drain Line: If there’s a drain hose, pull it off or unscrew it.
- Disconnect Wiring: Take a photo of the wiring for reference. Then, disconnect wires from the control board or humidistat.
- Remove Humidifier Body: Most are screwed onto the ductwork. Unscrew and pull the unit off. You might need tin snips if it’s built in.
- Remove Bypass Duct (If Needed): Some systems have a bypass duct to remove.
Once the old unit is out, check for rust, mold, or damage. Clean the area before installing the new humidifier.

Credit: thediyplaybook.com
Preparing For Installation
A good setup makes installation smoother. Here’s what to do next:
- Check Furnace Manual: Look for any special steps or warnings about your furnace.
- Read the New Humidifier Manual: Every model is a bit different. The manual will show mounting templates and connection points.
- Mark Mounting Points: Use the template to mark where the new humidifier will go.
- Check Water Supply: Make sure the shutoff works and the line is in good shape.
- Inspect Wiring: If wires are frayed or damaged, replace them before starting.
Installing The New Humidifier
This is the main event. I’ll walk you through a typical bypass or fan-powered humidifier install. Steam units are more complex—if you’re installing one, check the manual and consider professional help.
Mount The Humidifier
- Mark Cutout: Use the template to outline the opening on the duct. Double-check placement for clearances and airflow direction.
- Cut the Opening: Use tin snips to cut the sheet metal. Wear gloves—edges are sharp!
- Attach Mounting Plate: Secure it with screws. Make sure it’s level.
- Install Humidifier Body: Slide it into the opening and screw it to the mounting plate.
Connect The Water Supply
- Install Saddle Valve: If needed, attach a saddle valve to a cold water pipe. Tighten it to pierce the pipe.
- Run the Water Line: Connect the water line to the valve, then to the humidifier. Use Teflon tape on threads.
- Tighten Connections: Hand-tighten, then snug with a wrench. Don’t overtighten.
- Check for Leaks: Open the valve and watch for drips. Tighten more if needed.
Connect The Drain Line
- Attach Hose: Slide the drain hose onto the humidifier’s drain fitting.
- Run to Floor Drain: Secure the other end at a safe floor drain. Avoid sharp bends.
- Secure Hose: Use zip ties or clamps to keep it in place.
Wire The Humidifier
Most models use low-voltage (24V) wiring, but always check your manual.
- Connect to Humidistat: Use the wiring diagram as a guide. Attach wires to the humidistat and humidifier.
- Connect to Furnace: Some systems connect to the furnace control board, others to a transformer. Reference your photo or the wiring diagram.
- Secure Wires: Use electrical tape or wire nuts.
- Double-Check Connections: Loose wires cause problems later.
Install The Bypass Duct (if Needed)
If your unit has a bypass duct:
- Cut Duct Opening: Mark and cut a hole for the bypass duct.
- Install Duct: Attach with sheet metal screws and seal with foil tape.
- Check Airflow Direction: The duct should follow the arrows shown in the manual.
Set Up The Humidistat
- Mount the Humidistat: Place it on the return duct or near your thermostat, as the manual suggests.
- Connect Wiring: Hook up wires from the humidifier and furnace.
- Test Controls: Set the humidistat to the recommended starting level (usually 35–45%).
Testing And Adjustments
Before you put everything back together, it’s time to test:
- Turn Water and Power Back On: Open the water valve, then restore power at the breaker.
- Run the Furnace: Set your thermostat to heat mode and raise the temperature.
- Check Operation: The humidifier should run when the furnace blower is on. Watch for leaks or weird noises.
- Adjust Humidistat: Start at 40%. If windows fog up, lower it. If air feels dry, raise it a bit.
- Inspect for Leaks: Check all connections after a few hours. Tighten if needed.
On my last install, I noticed a slow drip from the water line after two days. It was a tiny leak, but over time, it could have caused a mess. Always double-check.
Common Mistakes And How To Avoid Them
Even careful DIYers make mistakes. Here are problems I’ve seen—and how to prevent them:
- Wrong Placement: Mounting the humidifier on the wrong duct side reduces effectiveness. Follow the arrows in the manual.
- Leaky Connections: Not using Teflon tape or overtightening can cause leaks.
- Poor Drain Setup: If the drain line isn’t secured, water can end up on your floor.
- Incorrect Wiring: Mixing up wires or skipping the wiring diagram can short out controls.
- Skipping the Humidistat: The humidistat controls humidity. Don’t just wire the humidifier to run nonstop.
Maintenance Tips For A Long-lasting Humidifier
A new humidifier works best with regular care:
- Change the water panel (pad) once a year. Some homes need it twice a year if water is hard.
- Clean the unit every fall before heating season starts.
- Check for leaks monthly during winter.
- Replace filters if your model has them.
- Flush the drain line to prevent blockages.
I usually schedule my humidifier maintenance when I change my furnace filter, so I never forget.
When To Call A Professional
Most handy people can replace a basic humidifier in 2–4 hours. But you should call a pro if:
- You’re not comfortable with wiring or plumbing.
- Your furnace is under warranty and DIY work could void it.
- You’re installing a steam model or a humidifier that requires special controls.
- You notice mold, rust, or water damage near your furnace.
Remember, safety and your home’s value come first. Sometimes, professional installation is worth the cost.
:max_bytes(150000):strip_icc()/anatomy-of-the-home-furnace-humidifier-1824773color-d41575bdba834fd59ac29178949a1e2a.png)
Credit: www.thespruce.com
Environmental And Health Benefits
Maintaining the right humidity in your home has big benefits:
- Better health: Proper humidity reduces dry skin, nosebleeds, and respiratory problems.
- Protects wood: Keeps floors, furniture, and instruments from cracking.
- Energy savings: Humid air feels warmer, so you can set your thermostat lower.
- Lower static: Less annoying shocks during winter.
According to the Environmental Protection Agency, indoor humidity should be between 30% and 50% for comfort and health (EPA Guide).
Practical Tips From My Experience
From my years of replacing humidifiers, here are two things beginners often miss:
- Always test the shutoff valve before you start. Old valves can freeze or leak. It’s easier to fix before you install the new unit.
- Label your wires before disconnecting. Even if you take a photo, little tags make reconnection simple.
And one more: keep the humidifier’s manual in a safe place. You’ll need it for future maintenance.
Frequently Asked Questions
What Size Humidifier Do I Need For My Home?
The size depends on your home’s square footage and insulation. For most homes under 2,000 square feet, a unit that adds 10–12 gallons per day is enough. Check the manual or ask the manufacturer for recommendations.

Credit: www.youtube.com
Can I Replace A Humidifier Myself, Or Do I Need A Professional?
If you’re comfortable with basic tools and wiring, you can replace a bypass or fan-powered humidifier yourself. Steam models are more complex and may need a professional.
How Often Should I Maintain My New Humidifier?
Change the water pad once a year (or more often with hard water). Clean the unit every fall and check for leaks monthly during the heating season.
What Are Signs My Humidifier Isn’t Working Right?
Low humidity in your home, static shocks, dry skin, or a noisy unit can all be signs. Also, check for leaks and mineral buildup.
Will A New Humidifier Increase My Energy Bills?
A properly sized and installed humidifier can actually lower your heating bills. Moist air feels warmer, so you can set your thermostat lower and stay comfortable.
Replacing a furnace humidifier is one of those home projects that pays off quickly. With the right tools, good instructions, and a little patience, you can improve your home’s comfort and air quality for years to come. If you ever get stuck, don’t hesitate to ask for help—your health, home, and happiness are worth it.